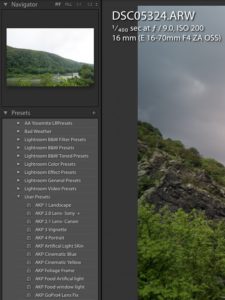
People that use Lightroom have one huge advantage over others that do not. It is not only an amazing image management software, but also, allows you to do some very fine-tuned image enhancements. I consider Lightroom to be somewhere between Photoshop and a simple file manager, like those bundled with cameras these days. If you are already familiar with Lightroom, there is a “Develop” section where you can change the exposure, contrast, saturation, etc. Advanced users may already know that you can create an effect on a photograph and then save those settings to be used on another photograph. These are called “presets” and can be found on the left hand side of the “Develop” window as shown here:
If you have already started to use presets, you know how easy it is to apply the enhancement from one image to another. If used judiciously, and I truly mean very carefully, you can apply them, and then tweak them appropriately. In this post, I am going to not only show you how I assessed an image, but also how I applied one of my presets I call “Radiant Sky”. If you are nice (which I am sure you are) you can even have this preset for free! At the end of this post, I have a link to this preset for you to download and install in your copy of Lightroom.
So, here is an image I took in Harpers Ferry last summer. Note the area I have circled. It is of the very drab looking sky.


At this point, I need to tell you that when you use RAW format in capturing images, you may not be able to see the rich detail that is hiding in your image. As an example, look at the circled area again. On a well-calibrated monitor, you can even see some hits of the evening magenta skies. Just a hint, not much more. If you use my preset on skies that have a bit of these colors, you will see that they will get enhanced. Also, overcast and late afternoon skies will get enhanced the best with this preset. Please do not use it on skies that are already vibrant. If you do, your results may look ghastly. Also note that it not only fixes the sky, it also does some magic on the foliage, local contrast (aka clarity), lens profile correction, etc. One final note – there are some spotlights in the sky. If you do not like the look, you can either delete them, move them, or change their parameters to suit your tastes.
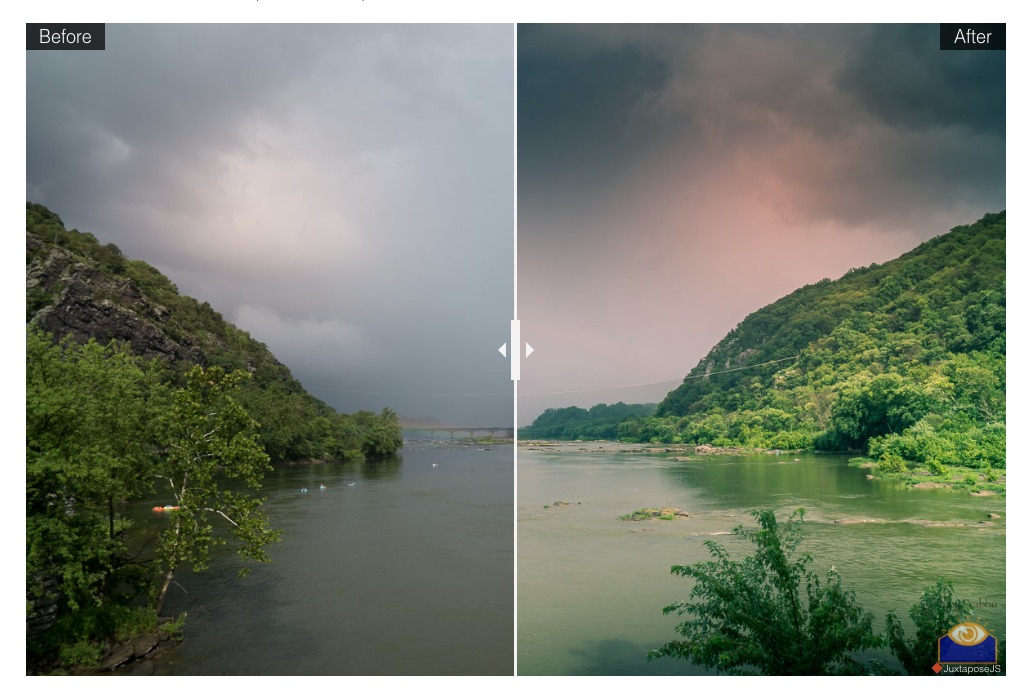
So here is the before and after photo. Would you believe that one click is all it took?

Click here to get this preset. Free of course! 🙂
Leave a Reply